
In 1973, Tandberg launched a set of new speakers that broke with their tradition of speakers in brown, box-shaped enclosures, the Fasett. They were available in orange, olive green and light beige, of which the orange ones became most popular.
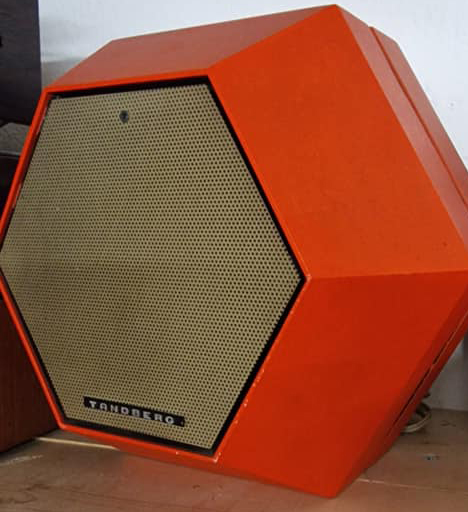
The speakers were constructed as a compact 2-way system with 5″ woofers and 6.5 liters enclosures.
Today, these are quite popular among collectors, and are typically prices around NOK 3000 per pair, when in good condition.

I took the chance to buy a pair untested, and with unknown technical condition, for nok 500. Sadly, both woofers and tweeters were ruined, probably due to excessive power.
Tweeter with coil breakage and woofer with horrible scraping sounds -> beyond repair.
The cabinets were scratched and some of the paint was worn off. Most people would probably just throw them away, but I decided to use them for something creative.
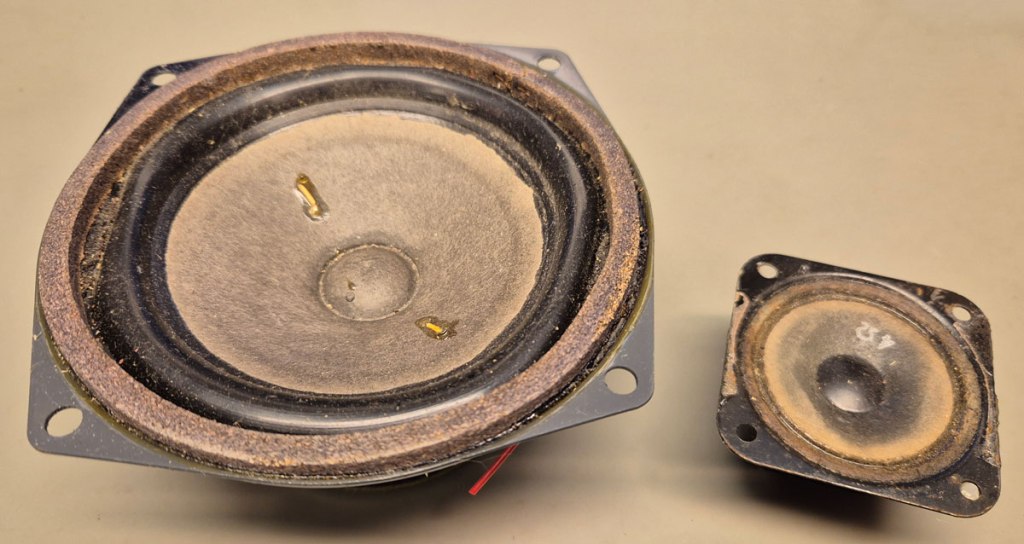
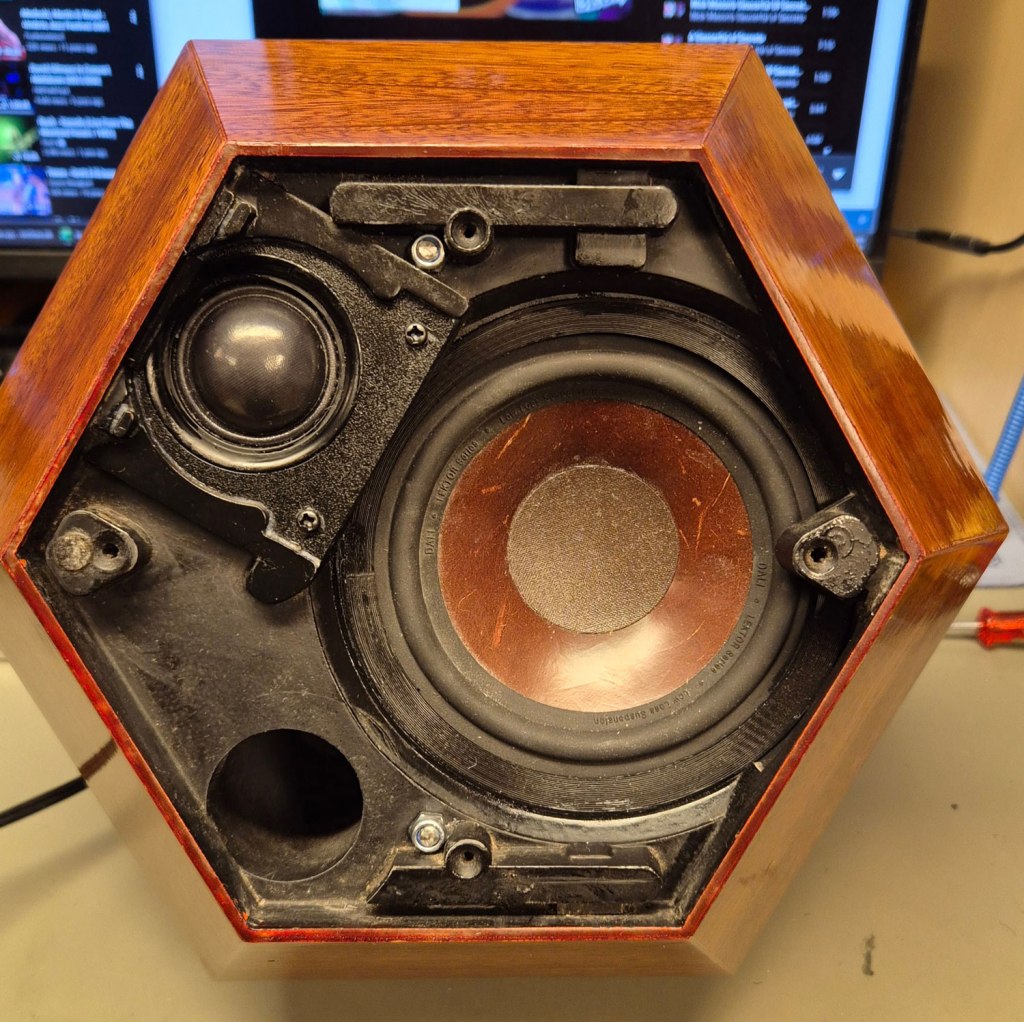
Luckily, I did also have a pair of Dali Lektor 1, with damaged cabinets but with speaker elements in good condition. These Dalis have a similarly sized bass reflex enclosure and with small modifications the elements could be made to fit inside the Fasett cabinets.
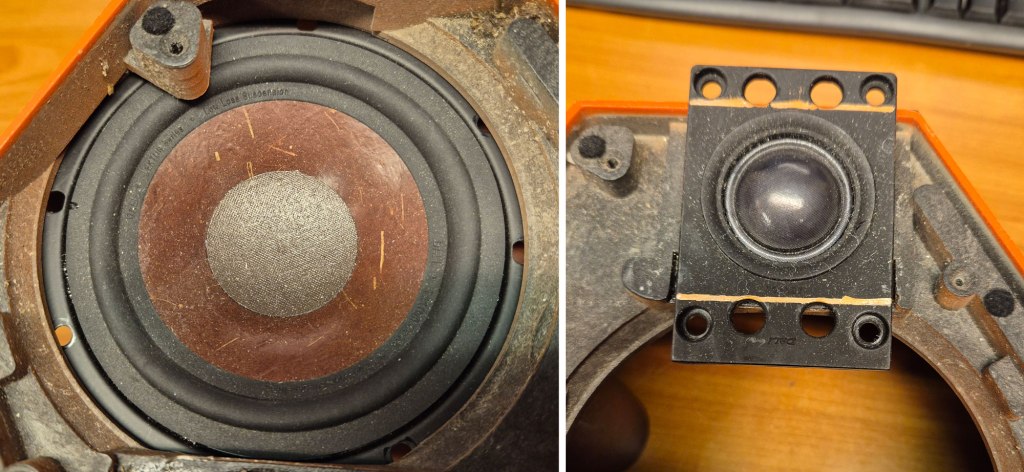
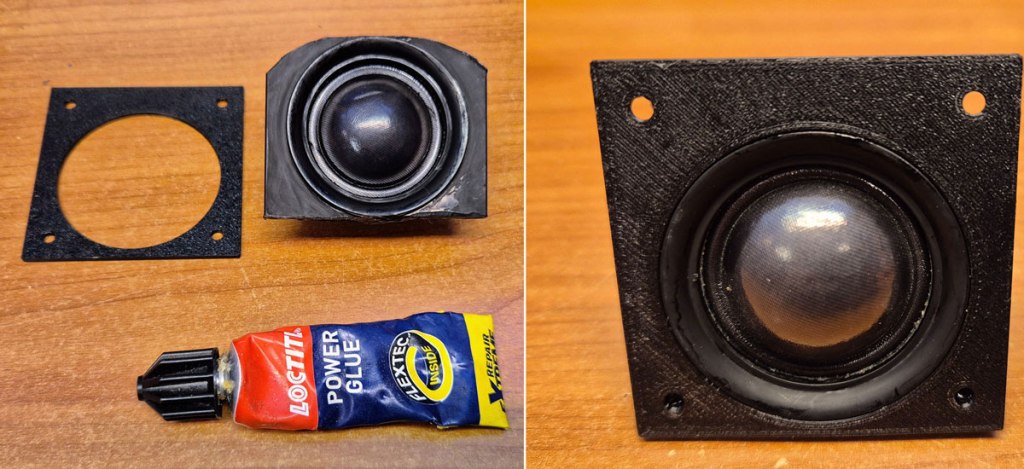
The tweeters were cut to size and glued to 3D-printed adapter plates.
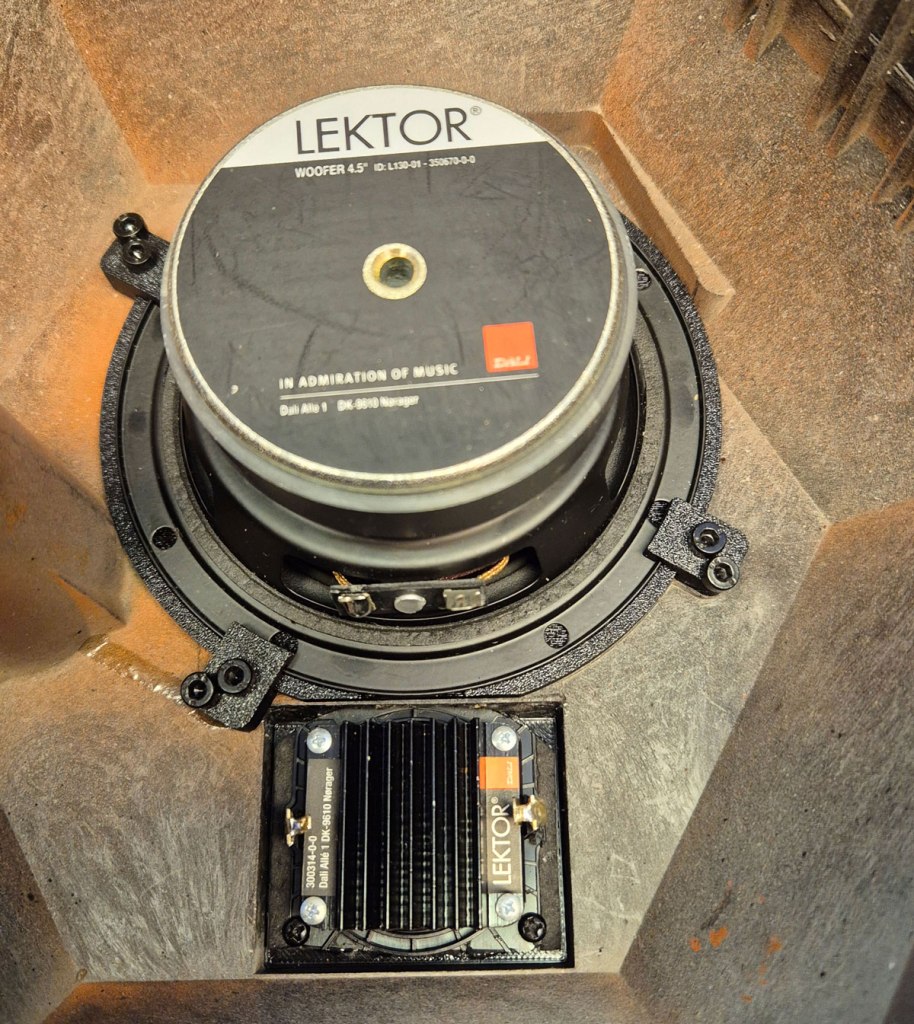
For the woofers, I made custom adapter rings and mounting brackets.
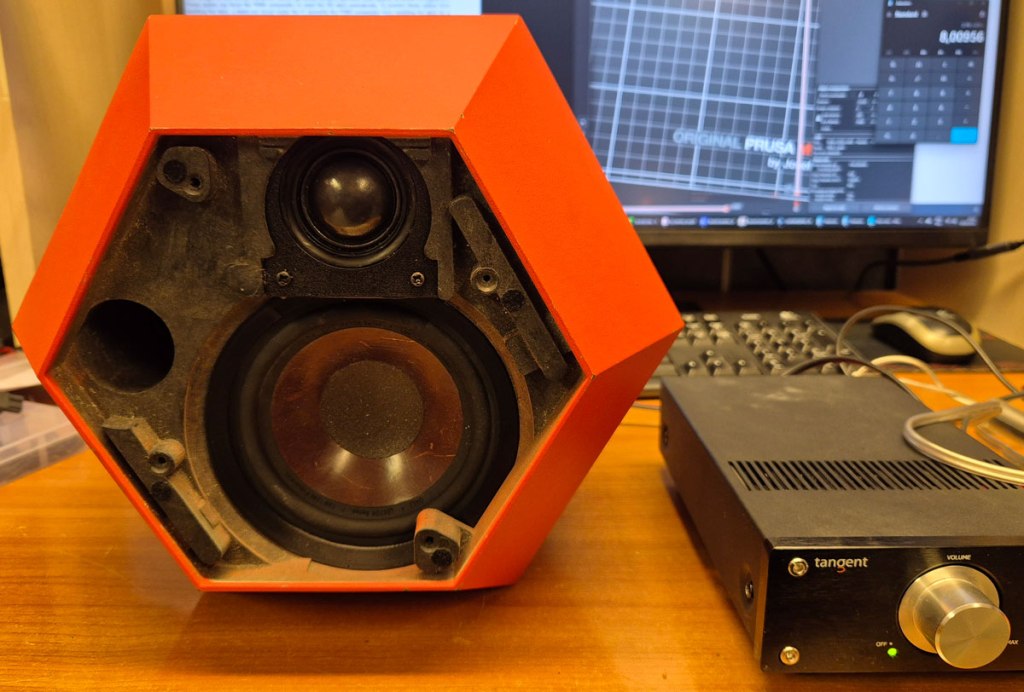
First listen with Dali elements mounted in a Fasett cabinet. This sounded promising, so I went on to renewing the cabinets.
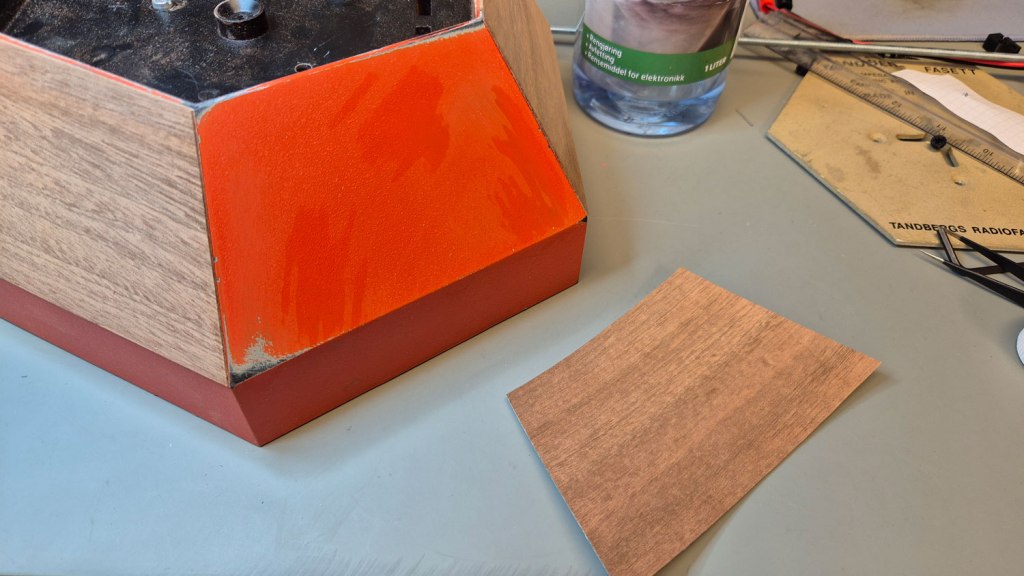
Re-painting the cabinets in the original orange color was out of the question; I like my speakers brown!
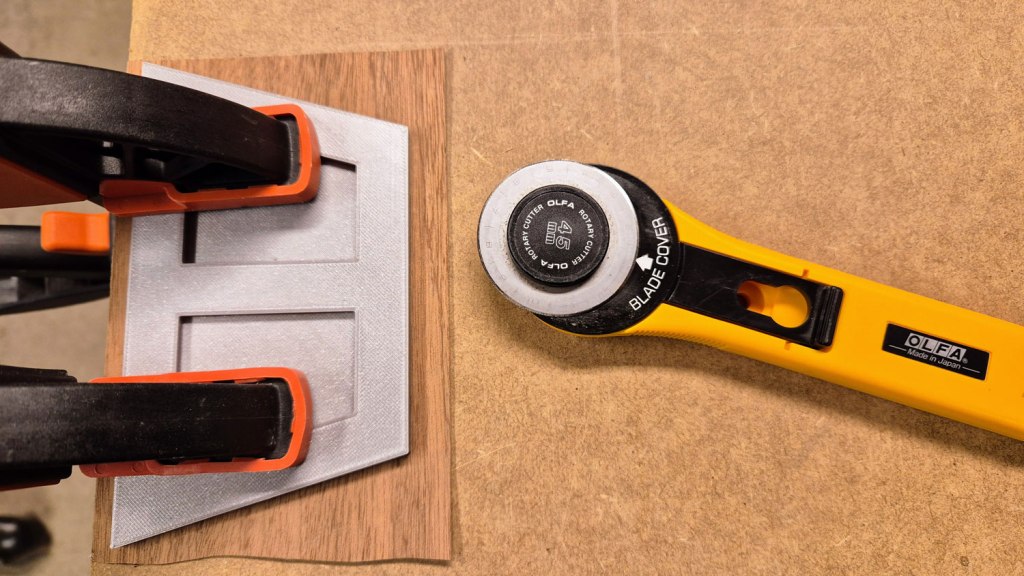
From an earlier project, I had some leftover self-adhesive mahogany veneer. With some 3D printed guides, it was fairly easy to cut it to pieces that fit the unusually shaped cabinets.
The cabinets were sanded and then degreased with isopropyl alcohol to ensure good adhesion.
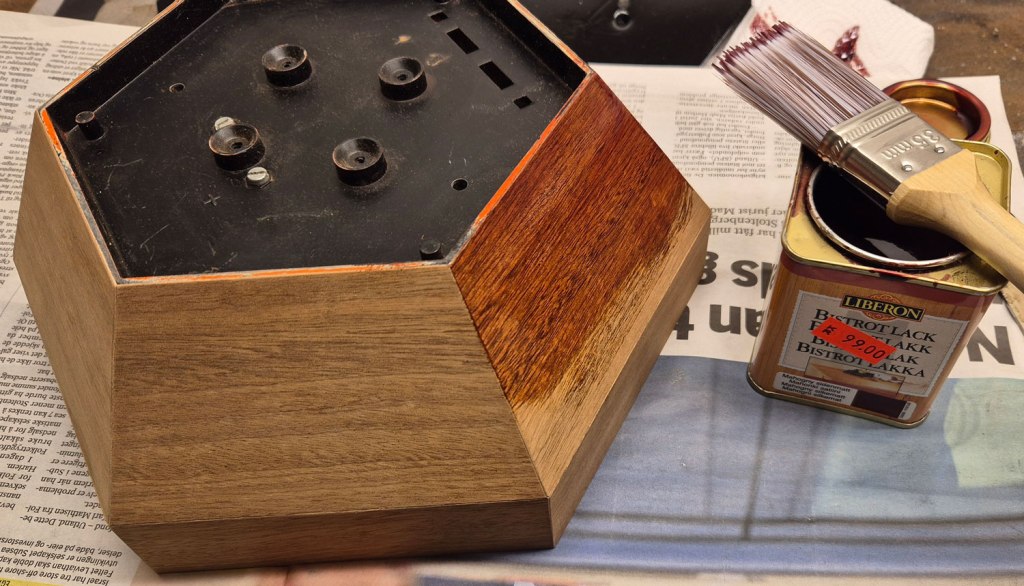
The veneer was a bit pale, so I added a layer of mahogany colored varnish, before applying 8 coats of clear varnish.

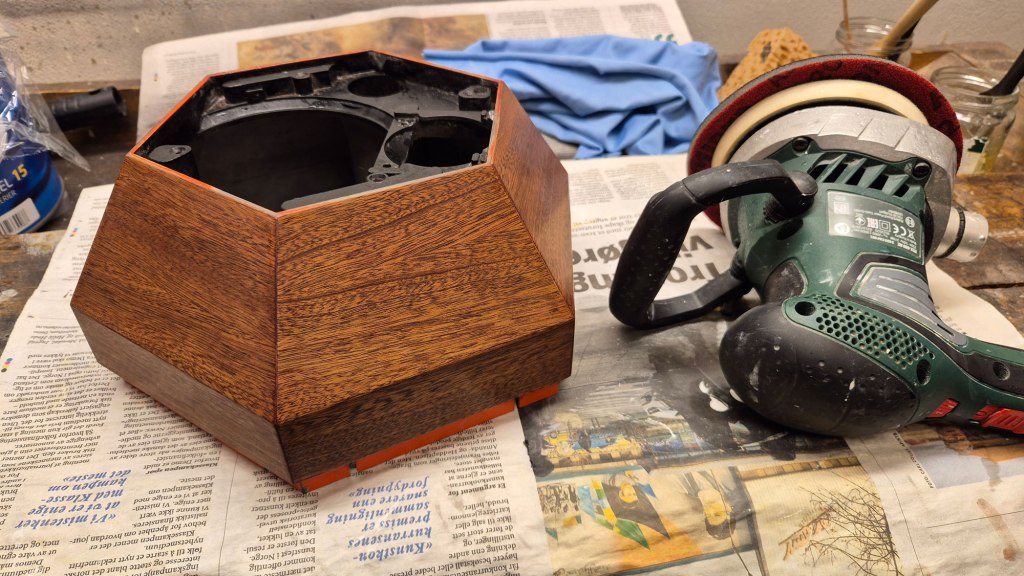
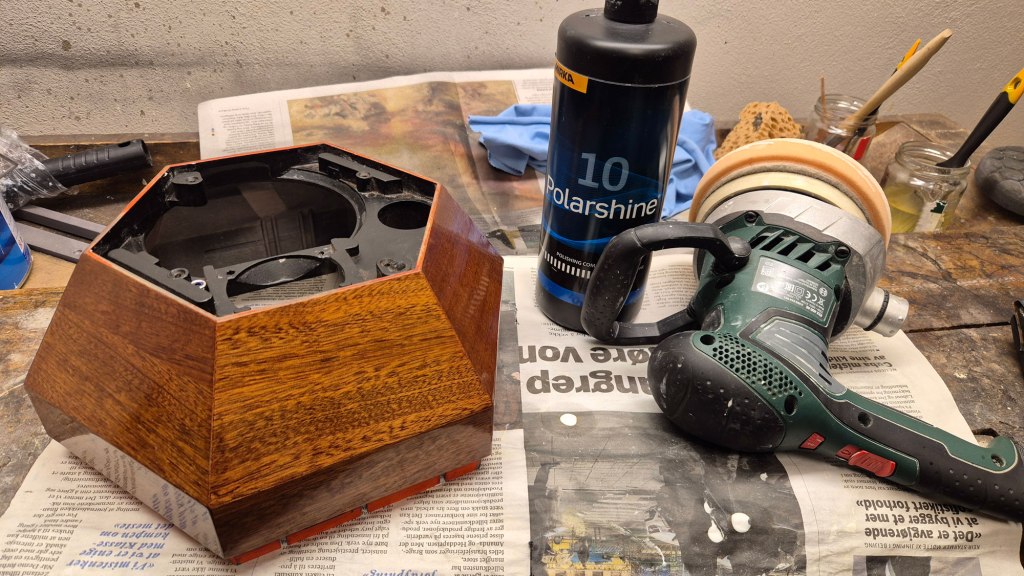
After the varnish had completely cured, I sanded with P1000, for a smooth (but matte) surface.

For speaker fronts, I considered different options: original steel mesh grilles (though painted black), fabric, or something resembling the grooved veneer fronts of the Tandberg Hi-Fi System speakers from the 60s and 70s. I went with the latter alternative, though not of veneer, which would be hard to make thin enough and still sufficiently robust, but of plastic.
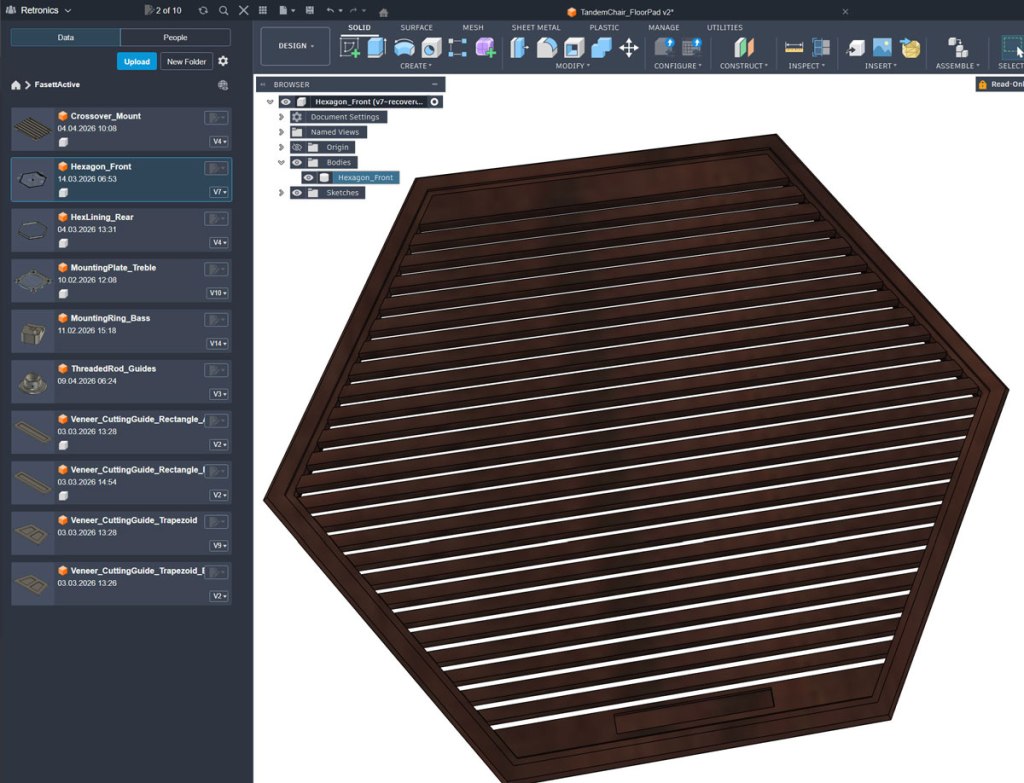
These were printed in PLA with color ‘Mystic brown’ from Prusa. Directly from the 3D printer this looked like a nasty cross between brown and purple, but with the right finishing they turned out quite nice.
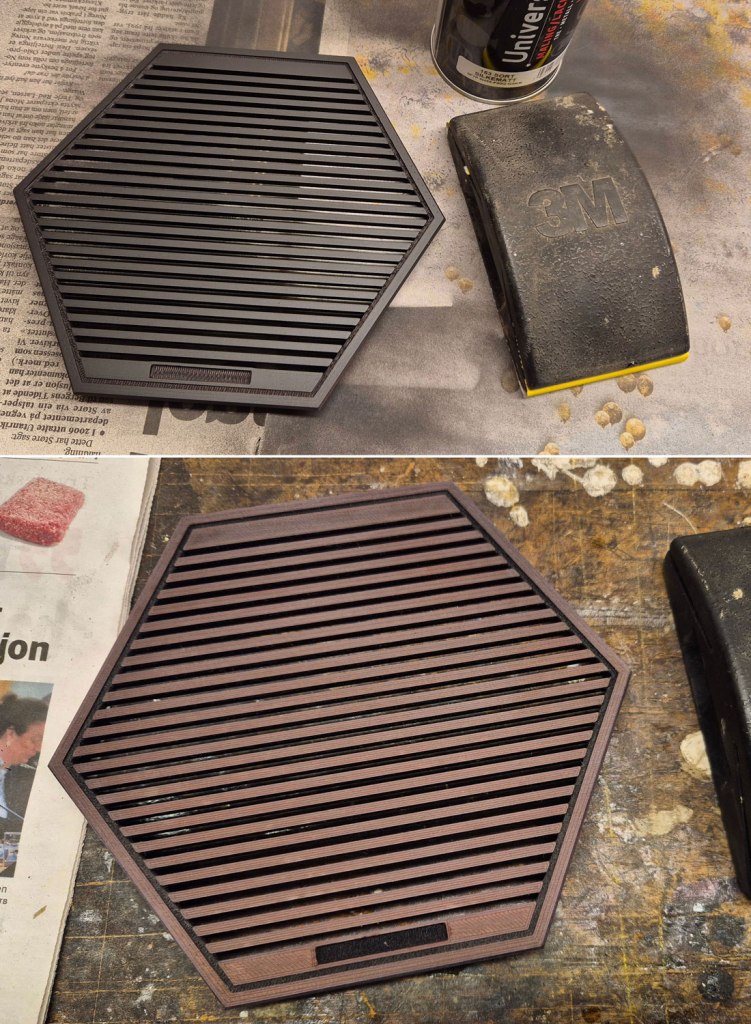
To darken the grooves and spaces, I sprayed on a layer of black paint, and then sanded off excess paint, to reveal the brown plastic.
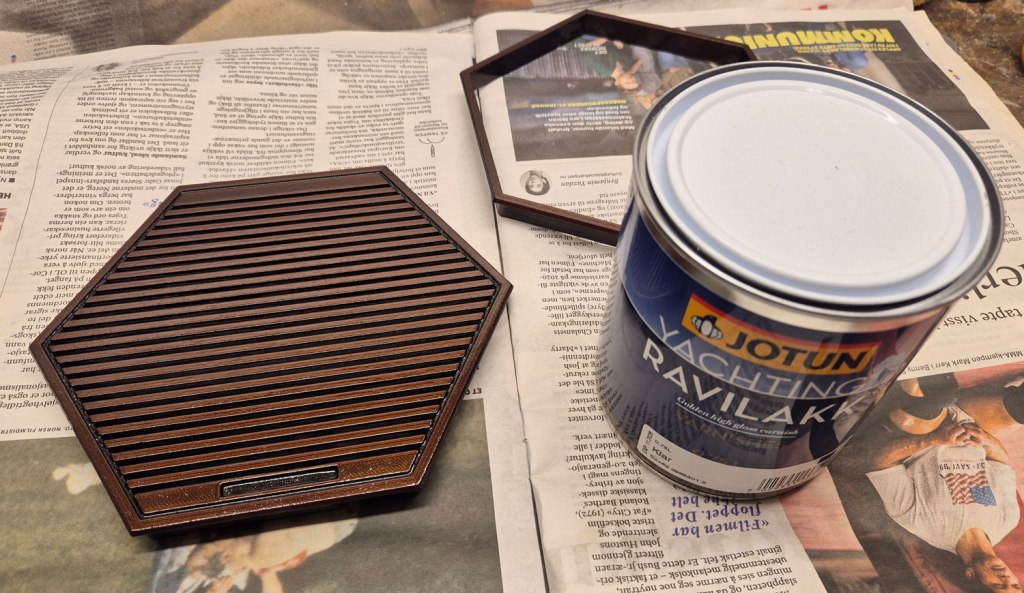
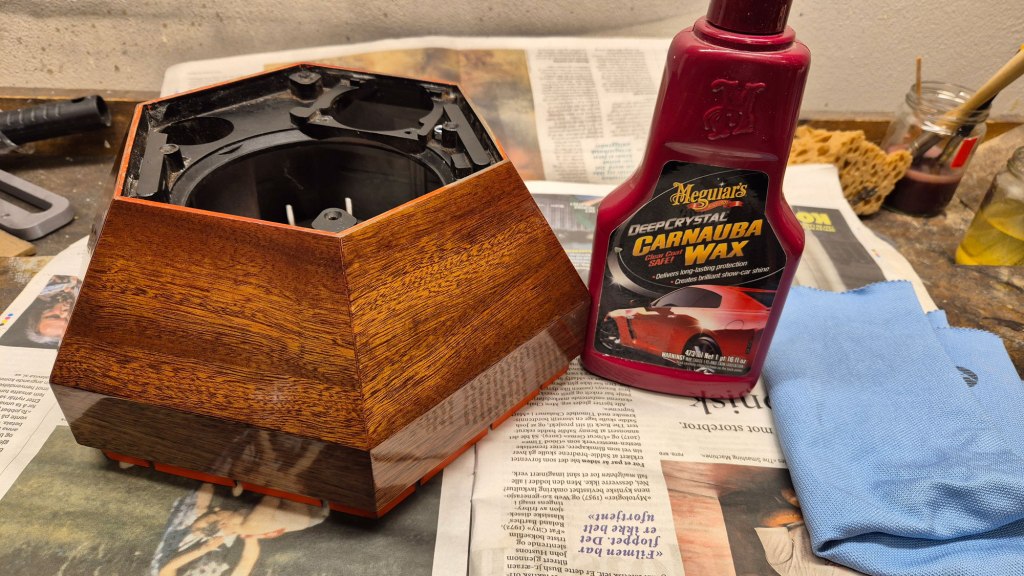
Next, I added 8 layers of golden varnish, sanded to a smooth surface, and then polished to high gloss in the same manner as with the veneer.
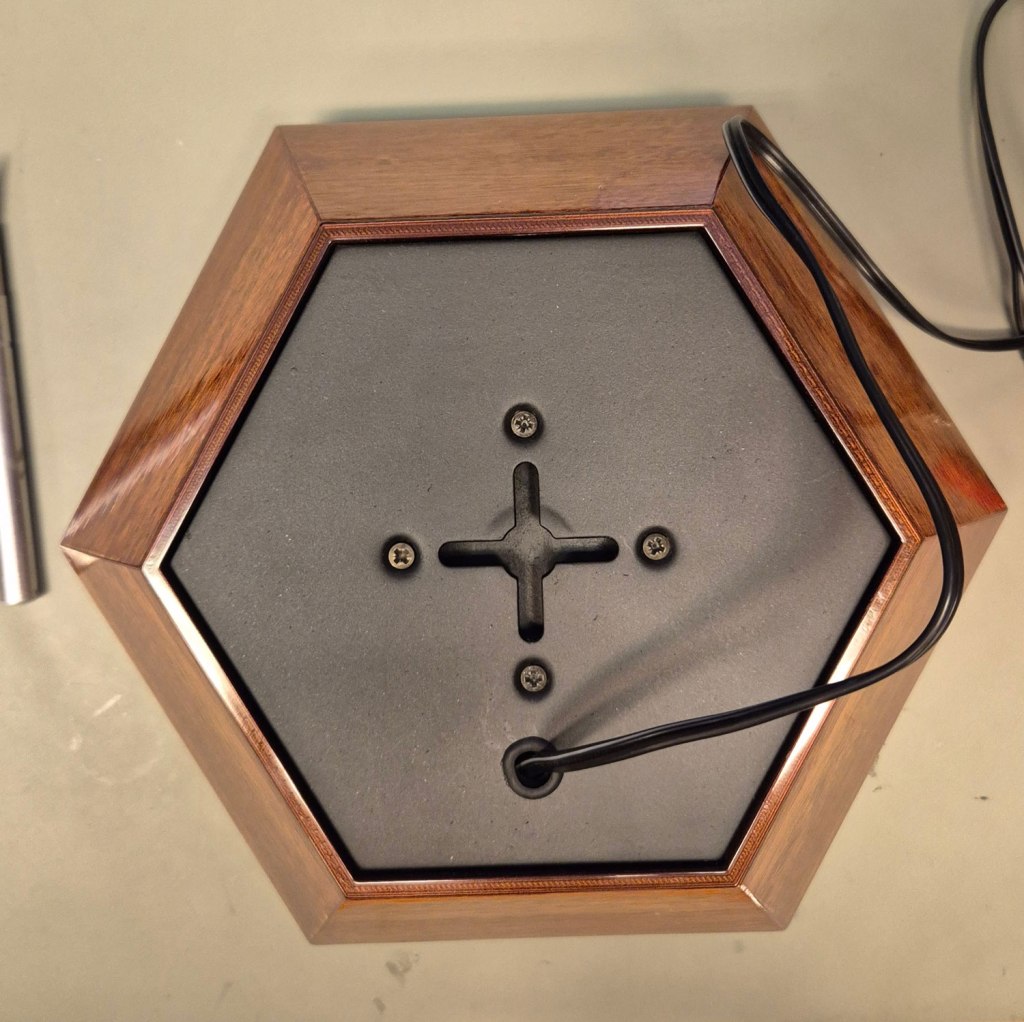
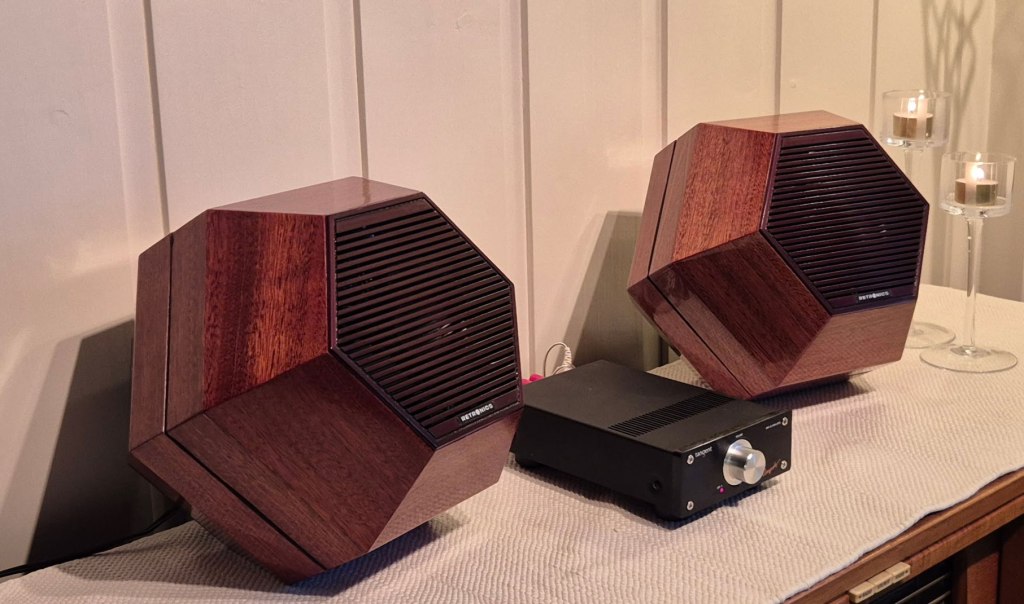
I also made hexagonal PLA frames (one is visible in the background of this picture), for the speakers back sides.
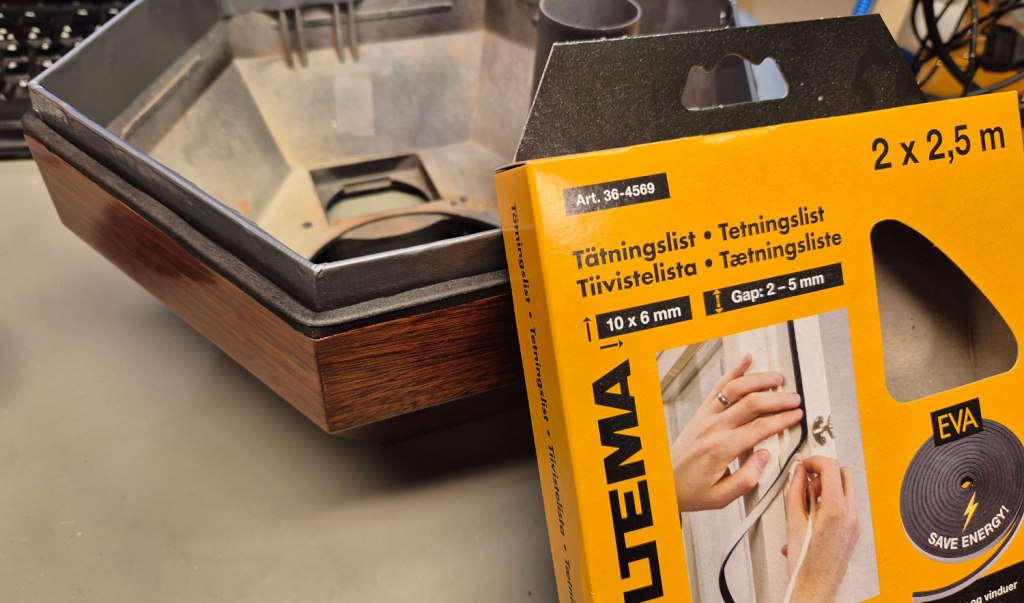
The original foam sealing between the speakers’ front and rear parts was crumbling to pieces, so these were replaced with new ones.


The Dali crossovers were places on 3D-printed mounting plates, on the speakers’ rear halves, and connected to the original speaker terminals.
Reverse conical guides made it easier to thread the steel rods through the cabinets’ rear halves during final assembly.
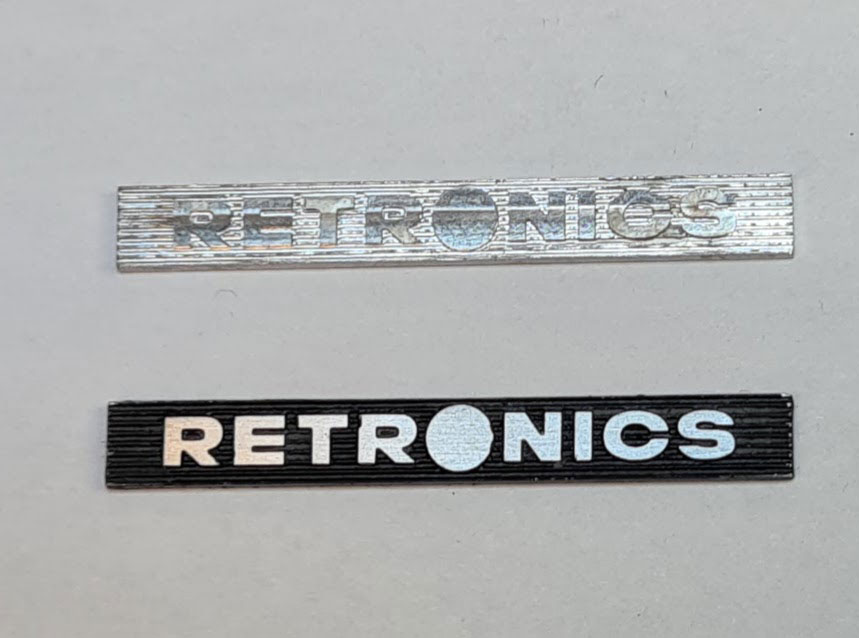
The Tandberg logo plates were missing. Anyway, the new speakers were radically changed from the original ones, so insted I made my own logo plates; designed in Fusion and machined in aluminium by jlccnc.com.
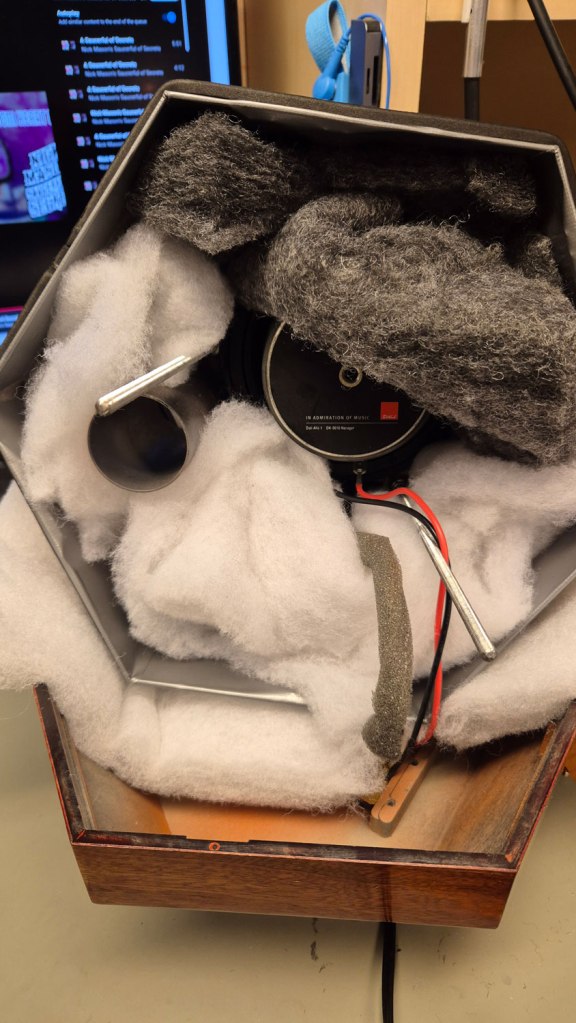
Filling the speakers with acoustic dampening material. I reused wadding from the Dalis and leftovers from other speaker projects.
One speaker under test before attaching the front grille.
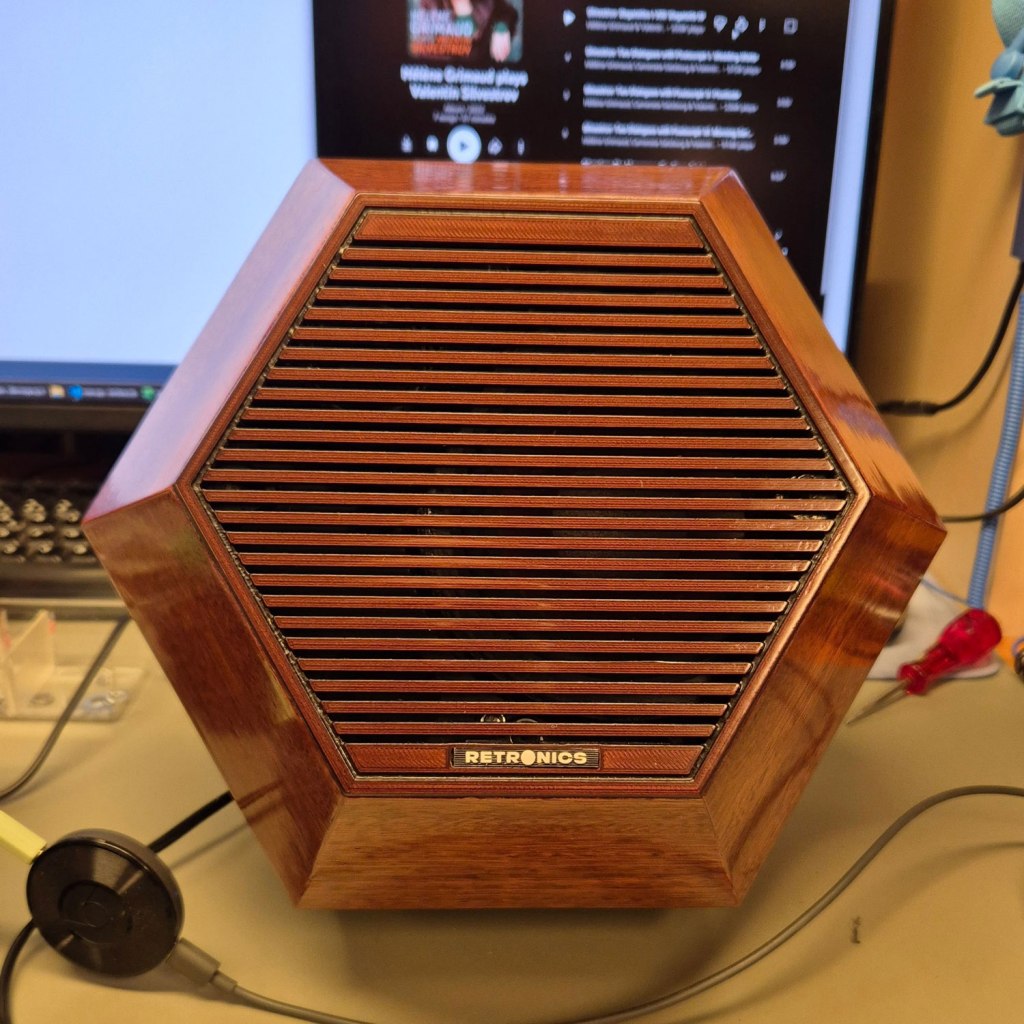
With front grille attached.
A short demonstration video:
The visual appearance and acoustic performance is better in real life than what is depicted in the video, but at least you get some impression 🙂

Leave a comment