
Processes
-
Project: My first tube amplifier, part 2: construction

Building a simple tube amplifier. Continue reading
-
Project: My first tube amplifier, part 1: circuit design
Designing a simple tube amplifier. Continue reading
-
Concept: Breadboard prototyping vacuum tube circuits
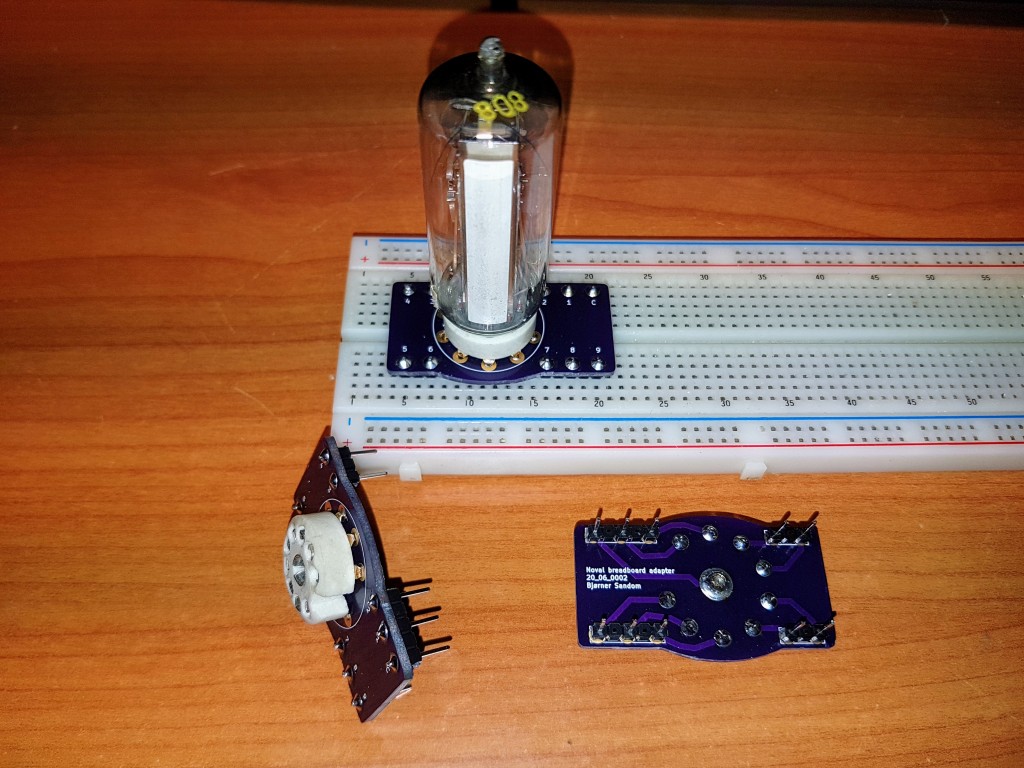
Faster and easier experimentation and prototyping with breadboard adapters. Continue reading
-
An MW loop antenna made from scrap material (and some 3D-printed parts)

In the beginning, there were some teak mouldings from an old living room table, mahogany bars from a trashed radio console cabinet, some pieces of MDF and plywood, a tuning capacitor, a spool of enameled copper wire, and no prior knowledge of loop antennas; that is a good start 😄 I built a base of… Continue reading
-
Restoration: Tandberg Sølvsuper 2
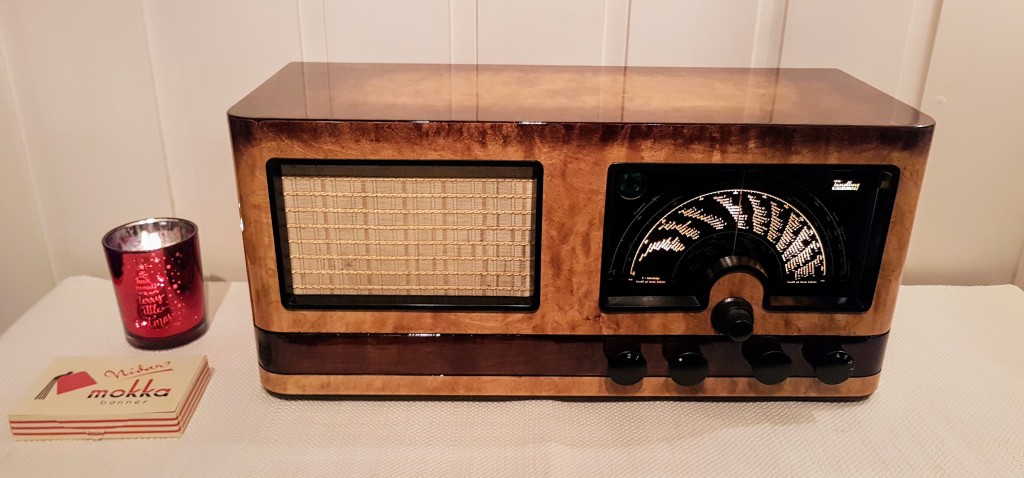
This model was manufactured between 1938 and 1941. During WW2, when Norway was occupied by Germany, Norwegian citizens were prohibited from owning radios, and this recently acquired radio was confiscated by the occupants in 1941, and then locked away for years, until it was reunited with its rightful owner in 1945. Some earlier repairs/modifications indicate… Continue reading
-
DIY capacitor leakage tester + high voltage PSU, part 5: testing and reforming an electrolytic capacitor
When electrolytic capacitors are unused for a long time, the dielectric made of aluminium oxide may deteriorate, allowing DC current to flow -> the capacitors become leaky. A basic capacitor tester is unable to measure this leak, but it may show confusing results. In this case, I am testing an electrolytic capacitor inside a radio… Continue reading
-
DIY capacitor leakage tester + high voltage PSU, part 4: measuring capacitor leakage
Leaky capacitors are a common cause of problems with electronic equipment. By leaky, I don’t mean that the capacitors puke out their own viscera, but that they are conducting a certain amount of DC current. This leakage cannot be tested with a just a multimeter. Capacitors used in vacuum tube circuits are often subject to… Continue reading
-
DIY capacitor leakage tester + high voltage PSU, part 3: simple test of the PSU performance
The PSU was tested using a 2.2kΩ resistor as dummy load, which when set to an output voltage of 180V, caused a current draw of 80mA. Oscilloscope measurements show ripple voltage of 3.5mV RMS (the probe is in x10 mode). This gives a ripple factor of 3.5mV/180V = 0.002%. Not bad for a DIY multifunction… Continue reading
-
DIY capacitor leakage tester + high voltage PSU, part 2: used as LED TV backlight tester
The project started with an LED TV with presumably defective backlight strips. It’s time to find out: Internally, the LED strips are connected in two different series loops, and markings on the TV PSU indicate that these loops shall be driven by 100V and 111V respectively. I connected the test instrument to one loop, set… Continue reading
-
DIY capacitor leakage tester + high voltage PSU, part 1: design and build
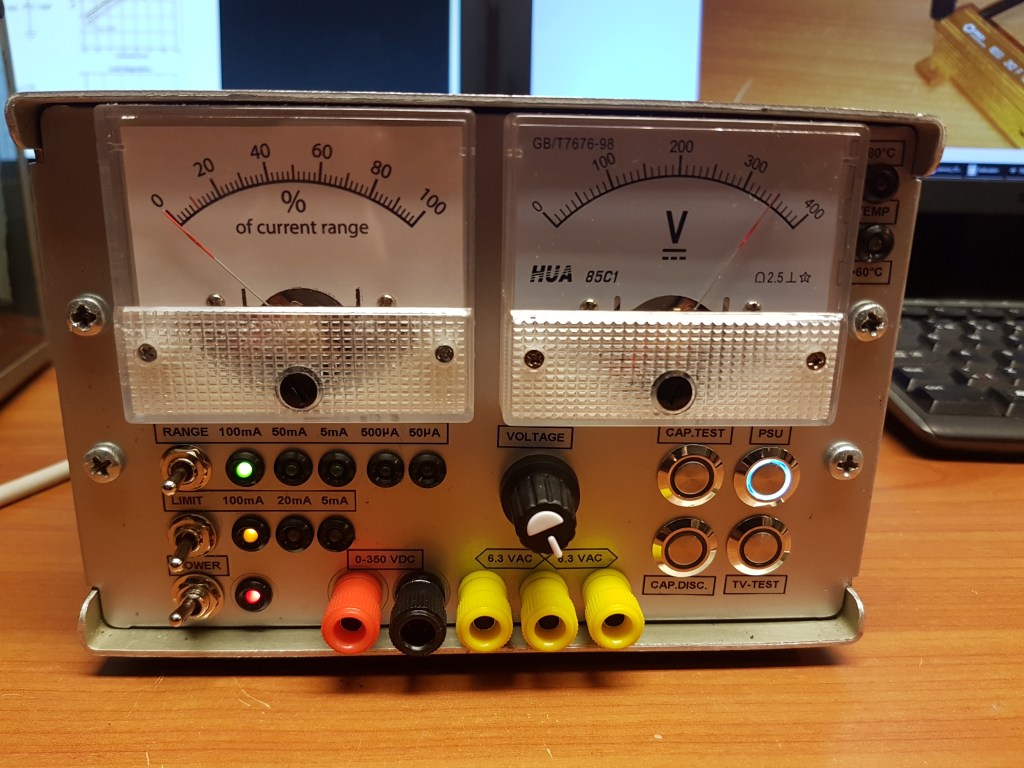
A homemade adjustable 350VDC PSU / capacitor leakage tester / LED TV backlight tester. Continue reading

CATEGORIES
- Devices (59)
- Audio amplifiers (4)
- Broadcast receivers (13)
- Instruments (24)
- Microcontrollers (9)
- Power supplies (1)
- Storage (1)
- Televisions (1)
- Tools (11)
- Vacuum tubes (1)
- Horticulture (3)
- Processes (61)
- 3D printing (13)
- Concepts (4)
- DIY (49)
- Modification (5)
- Recycled parts (5)
- Repairs (3)
- Restoration (8)
- Woodworking (1)
ABOUT ME
Self-taught electronics hobbyist. Collector of Tandberg and other Norwegian broadcast receivers.

