
The ATMEGA328P is well known from basic Arduino boards like Uno, Nano and Pro Mini. When buying one of these boards, you can step directly into programming the microcontrollers from Arduino IDE. If you have bought the same microcontrollers separately, you need to install a Bootloader before you can upload code via the serial interface.
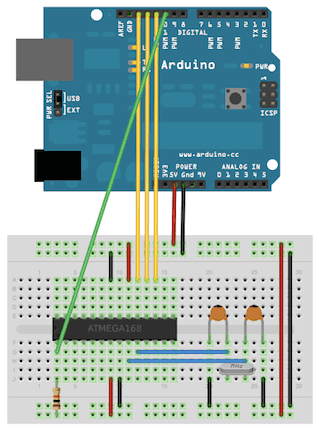
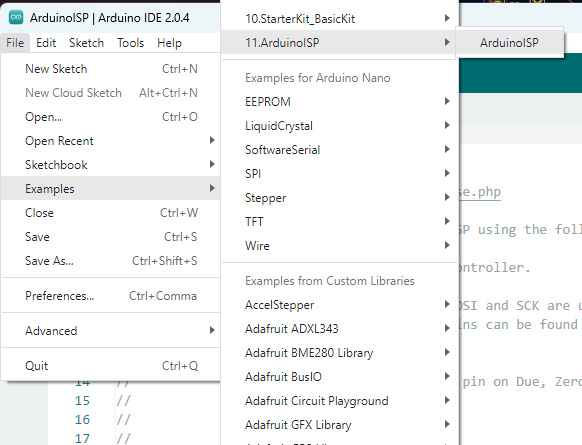
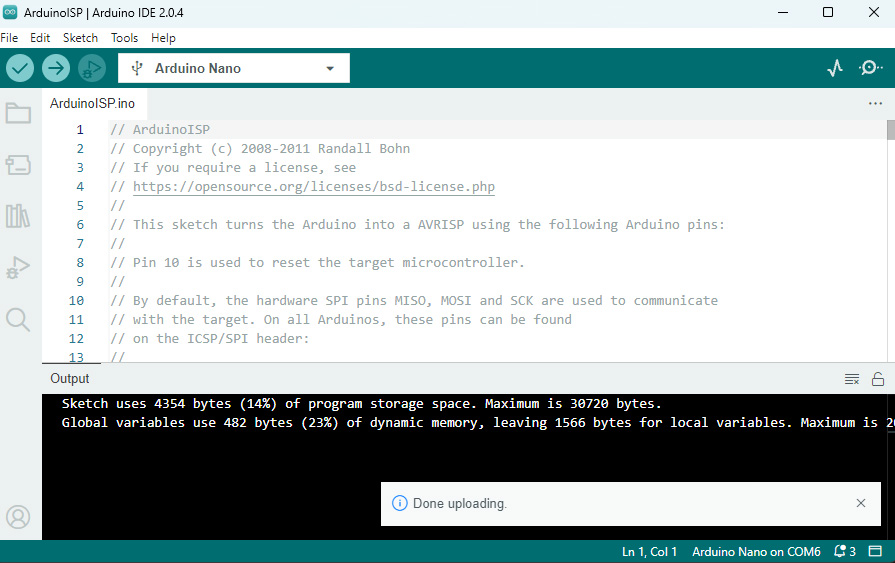
If you are using an ATMEGA328P-PU (in a DIP-package), just connect a basic circuit on a breadboard, and use an other Arduino board as a programmer, by following this guide: https://docs.arduino.cc/built-in-examples/arduino-isp/ArduinoToBreadboard
When using the surface mount version ATMEGA328P-AU on a custom designed PCB, it may be possible to burn the bootloader after soldering it to the PCB, along with some capacitors and a crystal, but this presupposes that you have connectivity to the GND, Reset and SPI pins, and that other circuitry doesn’t interfere with communication on these pins.
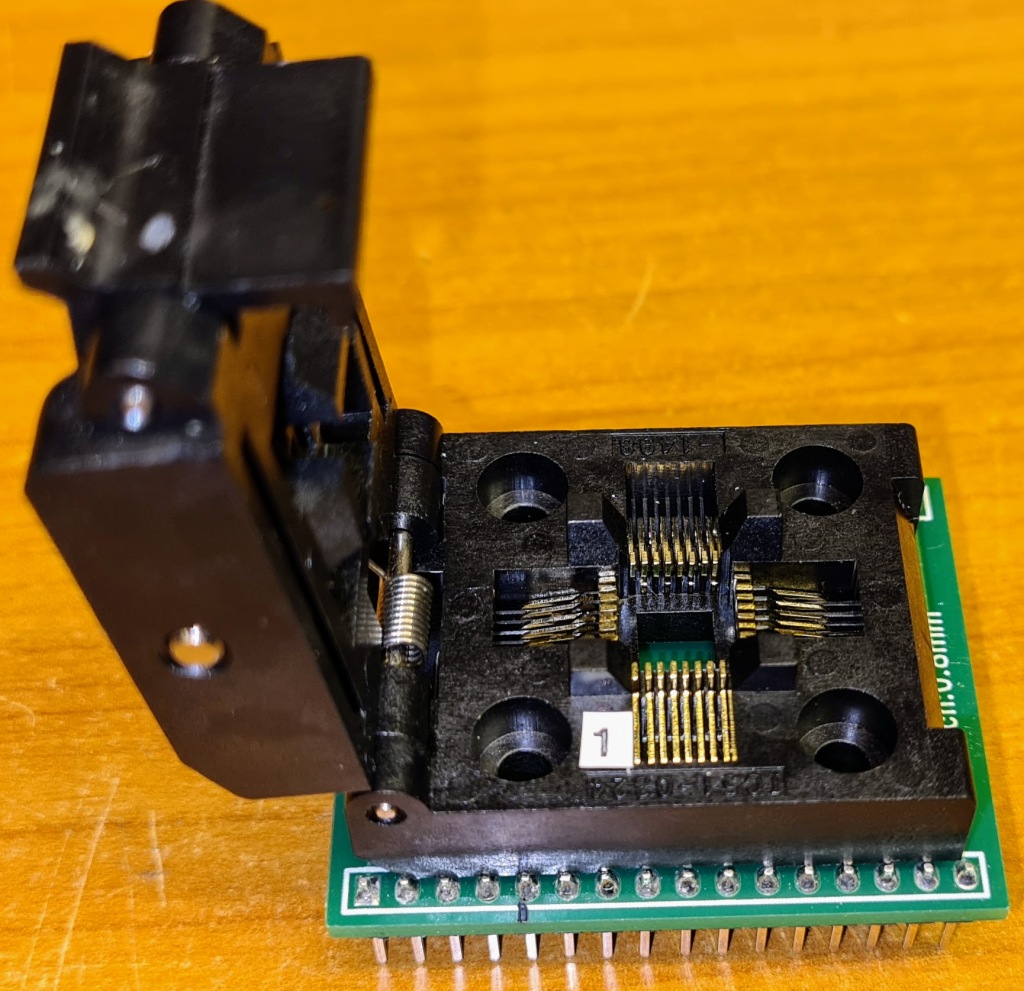
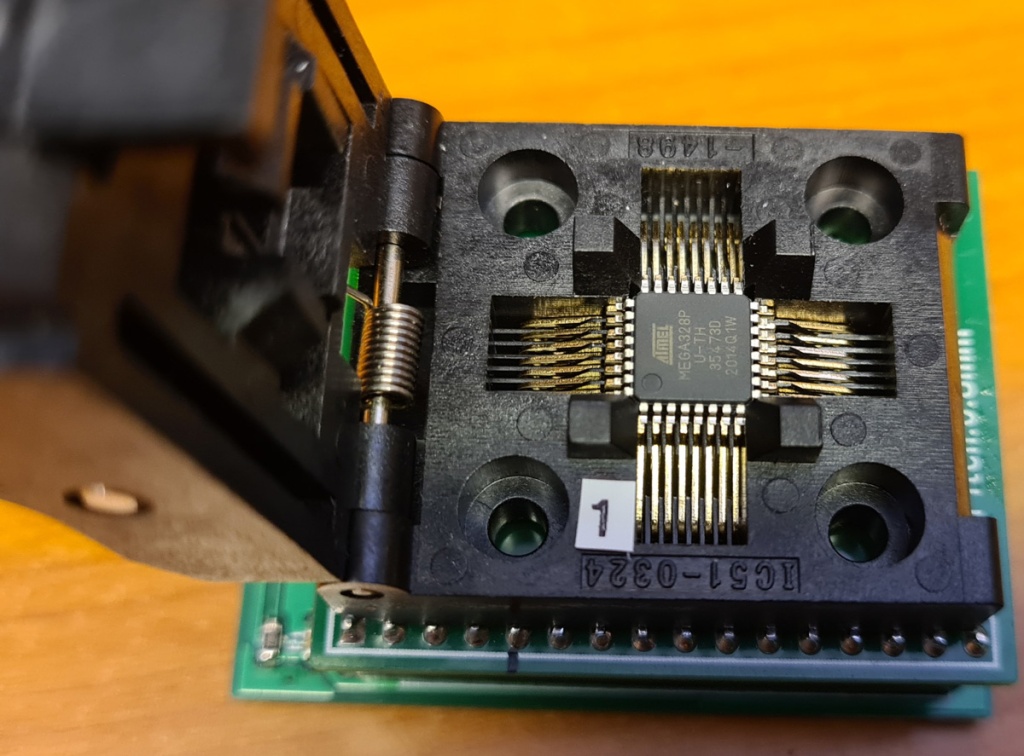
A better way is to burn the bootloader before soldering the ATMEGA to your PCB. Access to the needed pins can be achieved by using a TQFP32 “clamshell” socket. Search for e.g. “TQFP32 Socket SA663” on eBay, and you will find it.
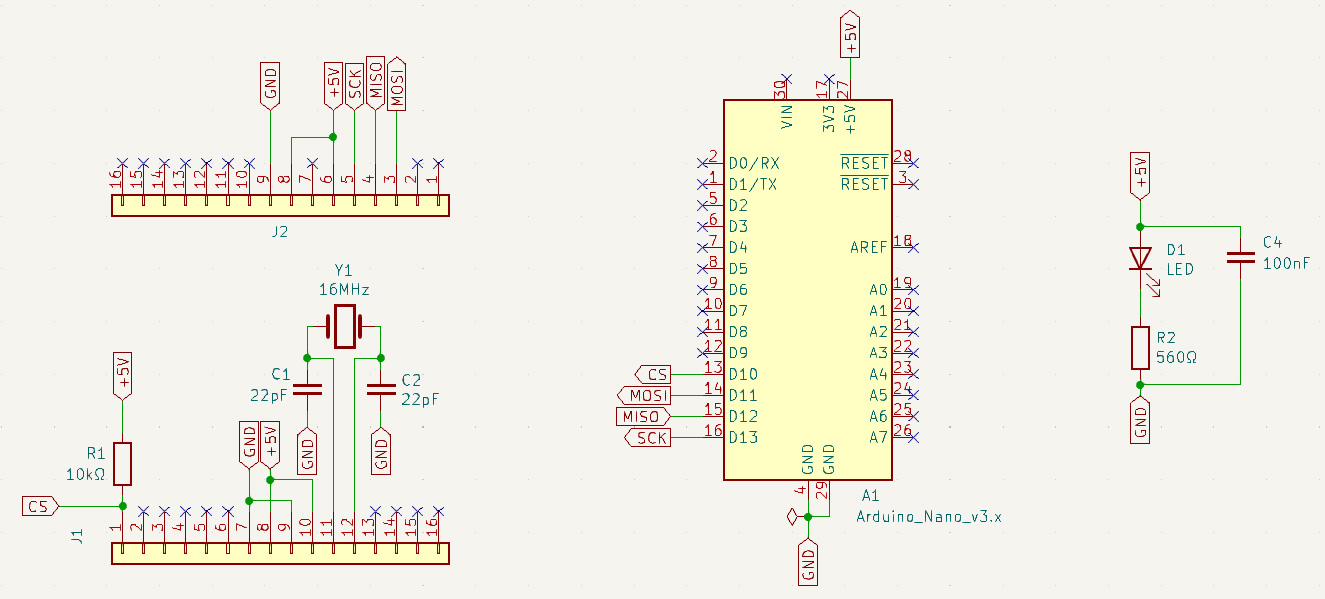
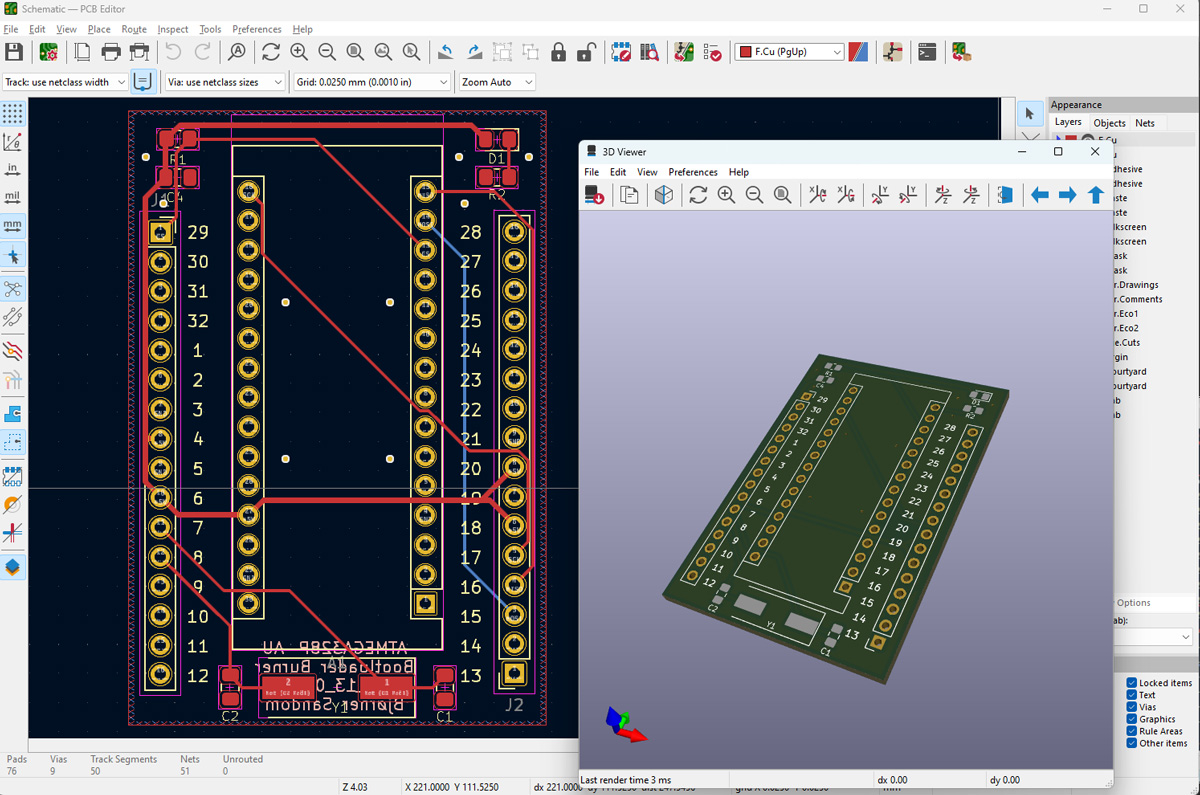
To avoid having to connect the same circuitry each time I shall burn a bootloader, I made a PCB with all needed hardware:
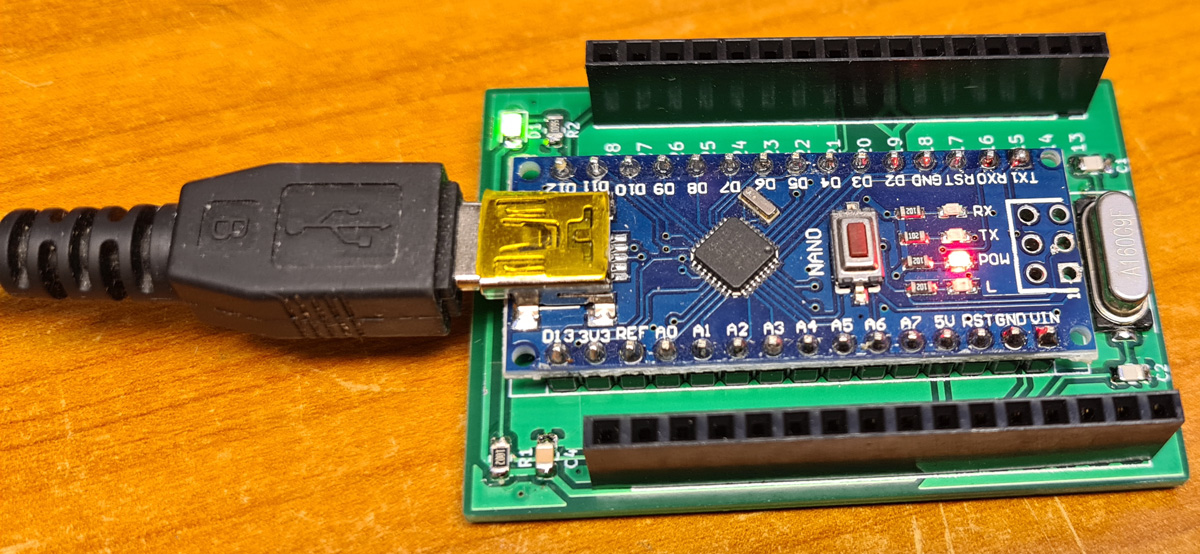
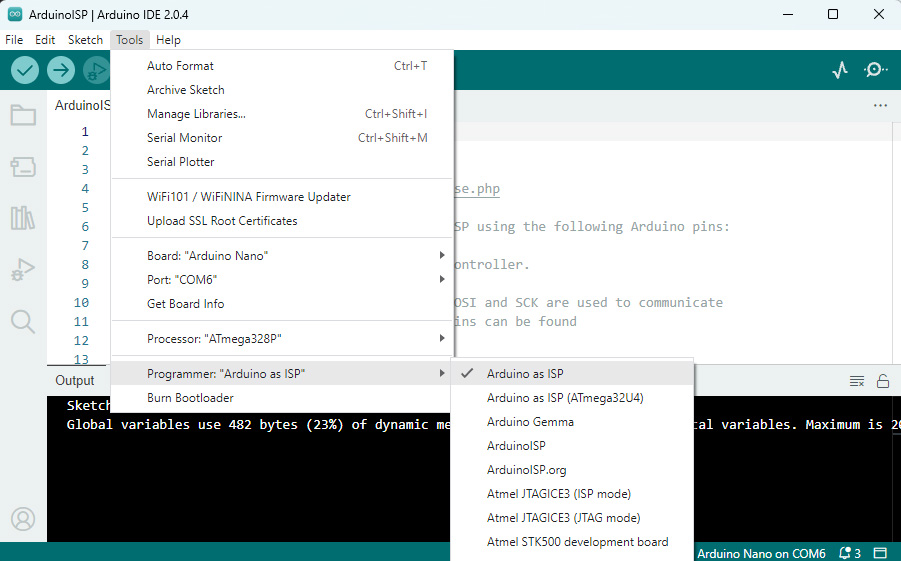
- An Arduino Nano, which works as a programmer, and provides USB interface.
- Pin headers for the TQFP32 socket.
- Crystal, load capacitors, and a few other components.
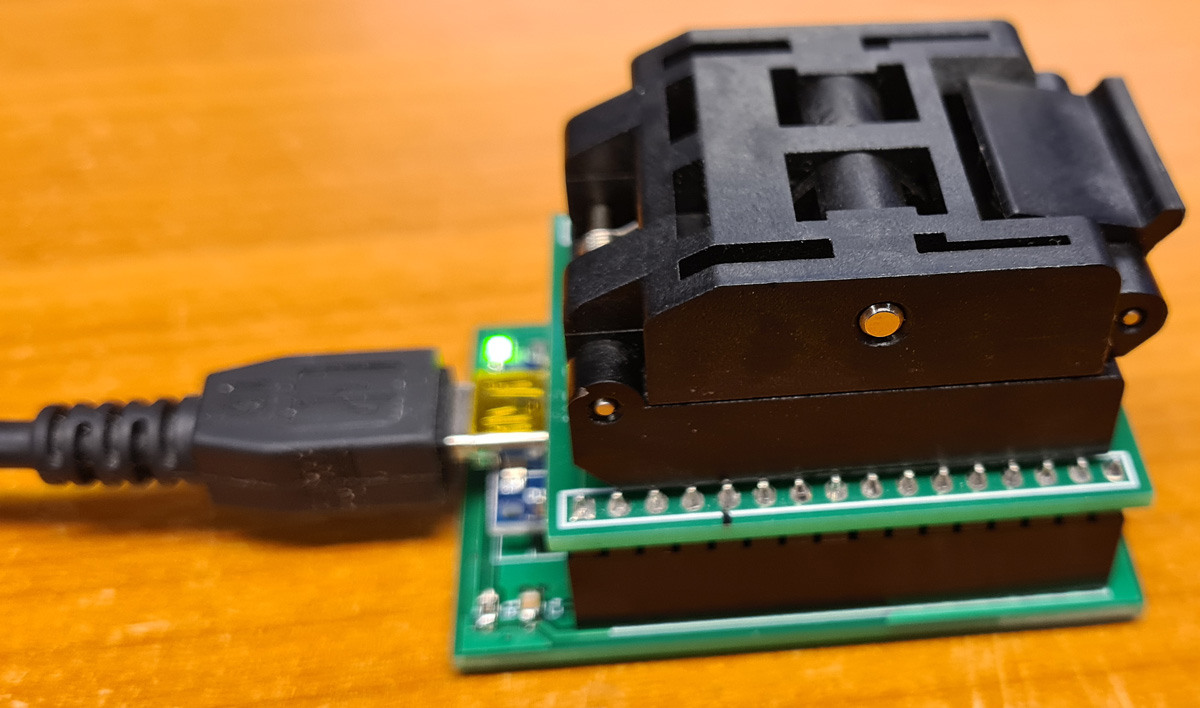
Now the Bootloader Burner is ready for use. Put an ATMEGA328P-AU in the clamshell adapter. Make sure that the orientation is correct. A label “1” marks where pin 1 shall be. On the ATMEGA, pin 1 is marked with a round recess.


Leave a comment