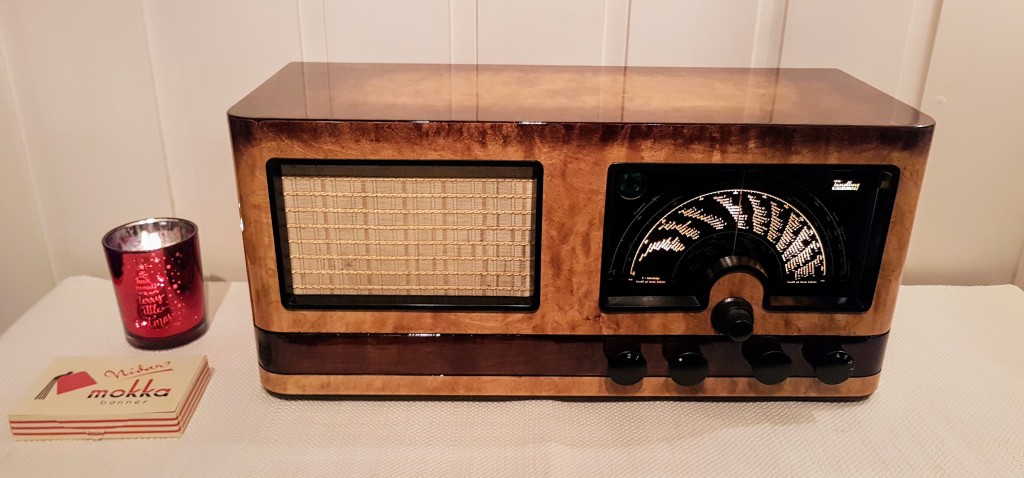
This model was manufactured between 1938 and 1941. During WW2, when Norway was occupied by Germany, Norwegian citizens were prohibited from owning radios, and this recently acquired radio was confiscated by the occupants in 1941, and then locked away for years, until it was reunited with its rightful owner in 1945. Some earlier repairs/modifications indicate that the radio was being used for years after that.
I received the radio as a gift from one of the previous owner’s great-grandchildren, complete and in pretty good shape.

When opening the cabinet, I was surprised to fint two speaker elements, and both of them connected via a pair of wires.

I had to ponder about this for a while before realizing that the bottom speaker was a Tandberg H150, which doesn’t have a permanent magnet, and hence has two coils: one to create a continuous magnetic field in addition to the voice coil. The other speaker is an H165, with permanent magnet, and was manufactured after 1945. Apparently the H150 was broken and had to ble replaced with a new speaker, but why was is still connected to the radio receiver?

The reason is found in the schematic: the field coil of H150 also works as a part of a pi filter, removing ripple after the rectifier. This speaker could of course have been replaced by a choke coil, but the repairman just let the H150 stay. For the sake of authenticity, I removed both the broken H150 and the working H165, and put in a working H150.
Using the leakage tester from my previous blog posts, I found that all the paper caps were leaky, and replaced them with polyester film caps.

The dual electrolytic cap from the PSU filter was successfully reformed using the technique described in previous blog post.
An evidence of an earlier repair is that some of the original Mica caps had been replaced by cheap single-layer ceramic caps, which are not particularly stable, and probably should not be used in oscillator circuits or RF/IF filters, so I used new Micas instead.

The power switch integrated with the volume control was broken, but I found a working replacement.

Then, after replacing two of the tubes, the radio was brought back to life. Time for alignment, following the procedure described in the service manual. The speaker looks really primitive with its leather suspension around the paper cone, but it sounds better than one would expect.

The chassis was given a good cleaning an polishing.

The cabinet’s original coating was crackled, discolored and in some places flaking off, so I removed the old varnish using Liberon Stripper before using fine sanding paper.

The darker areas were restored using Herdins Lakkbeis (stain) i the color Dark Oak, thinned out with alcohol.


The shiny amber finish was achieved using 6 layers of Jotun Ravilakk, a varnish marketed for wooden boats.

Re-painting the white markings on the buttons, before polishing them up with beeswax.


Patching flaked areas of the dial glass.


And finally: Watching and listening 🙂


Leave a comment